What Actually Happens During a Professional Air Duct Cleaning Visit in Tampa
Most Tampa homeowners schedule a duct cleaning and then wonder: what is the technician actually doing back there for two hours? It’s a fair question. The ductwork inside your walls and attic is invisible, the equipment looks unfamiliar, and the process can feel like a black box. This walkthrough breaks down every phase of a professional air duct cleaning visit, from the moment the technician arrives to the final system check, so you know exactly what you’re paying for.
Why Tampa Homes Have Unique Duct Cleaning Challenges
Humidity and Mold Risk in the Tampa Bay Climate
Tampa’s subtropical climate creates conditions that most northern cities never deal with. Relative humidity regularly climbs above 80 percent, and that moisture finds its way into ductwork through condensation, poorly sealed joints, and aging insulation. When organic debris like dust and pollen sits in a humid environment, it creates the conditions where mold can take hold. A thorough cleaning addresses not just loose debris but also the biofilm that can develop on duct liner surfaces over time.
This is one reason why the cleaning process in a Tampa home often takes longer than a comparable job in a drier climate. Technicians need to inspect carefully for moisture damage, not just accumulated dust.
Attic Ductwork and Florida’s Heat Factor
The majority of Tampa homes run flexible ductwork through unconditioned attics. Attic temperatures in summer can exceed 140 degrees Fahrenheit, which degrades the outer jacket of flex duct over time. That degradation can cause small tears and gaps where debris enters the duct interior. During a professional cleaning, a technician will flag any sections showing visible wear or disconnection, since cleaning a leaking duct system only solves part of the problem.
Older Homes and Legacy Duct Materials
Tampa has a significant stock of homes built between the 1960s and 1990s. Many of these properties still have original fiberglass duct board or early-generation flex duct. These materials accumulate debris differently than modern systems, and they require gentler agitation methods to avoid damaging the duct liner. An experienced technician adjusts technique based on what they find, rather than applying a one-size-fits-all approach.
Before the Technician Arrives: How to Prepare
Clear Access to Vents and the Air Handler
The single most useful thing you can do before a duct cleaning visit is clear a path to every supply and return vent in the home. Move furniture, rugs, and storage boxes away from floor and wall registers. The technician needs to remove each vent cover to access the duct opening, and obstructions slow the job considerably. Also make sure the area around your air handler unit is accessible. In many Tampa homes, the air handler sits in a closet, garage, or attic, so confirm there’s enough room to work safely around it.
Secure Pets and Sensitive Items
The equipment used during a professional cleaning generates significant suction and some vibration. Pets often react poorly to both. Plan to keep dogs and cats in a separate room or outside during the service. If you have delicate items on shelves near vent locations, move them beforehand. Dust dislodged during cleaning stays inside the duct system and the collection equipment, but the vibration from the vacuum hose against walls can rattle nearby objects.
Note Any Problem Areas
Before the technician arrives, walk through your home and note any vents that seem to produce weak airflow, any rooms that feel warmer or cooler than others, or any musty smells you’ve noticed near specific registers. Sharing these observations at the start of the visit helps the technician prioritize inspection in those areas. It also gives you a baseline to compare against after the cleaning is complete.
The Inspection Phase: What the Technician Is Looking For
Visual and Camera Inspection of the Duct System
A professional duct cleaning visit does not start with a vacuum. It starts with an inspection. The technician will remove several vent covers and use a flashlight or a small inspection camera to look inside the duct runs. They’re checking for visible debris accumulation, signs of moisture or microbial growth, disconnected sections, and any foreign objects (construction debris is common in attic ductwork of newer homes, and small toys are a frequent find in homes with young children).
This inspection shapes the entire cleaning plan. If the technician finds heavy debris in the return air side but relatively clean supply ducts, they’ll concentrate effort accordingly. If they spot a disconnected flex duct section, they’ll flag it for repair before or after cleaning.
Checking the Air Handler and Blower Compartment
The air handler is the heart of the system, and its condition directly affects duct cleanliness. The technician will inspect the blower wheel, evaporator coil, and drain pan. A coated blower wheel or a clogged drain pan can reintroduce debris and moisture into the duct system almost immediately after cleaning. Addressing contamination at the source is part of a complete service. Express Air Duct Cleaning Jupiter handles this inspection as part of the overall process, not as an afterthought.
Documenting Findings Before Work Begins
Reputable technicians document what they find before touching anything. This might be photos taken with the inspection camera, written notes, or a simple checklist. You should receive a summary of findings either during or after the visit. This documentation protects you as the homeowner: you can see exactly what condition the system was in before the cleaning began, and you can compare it to post-cleaning images if they’re provided.
The Cleaning Process, Step by Step
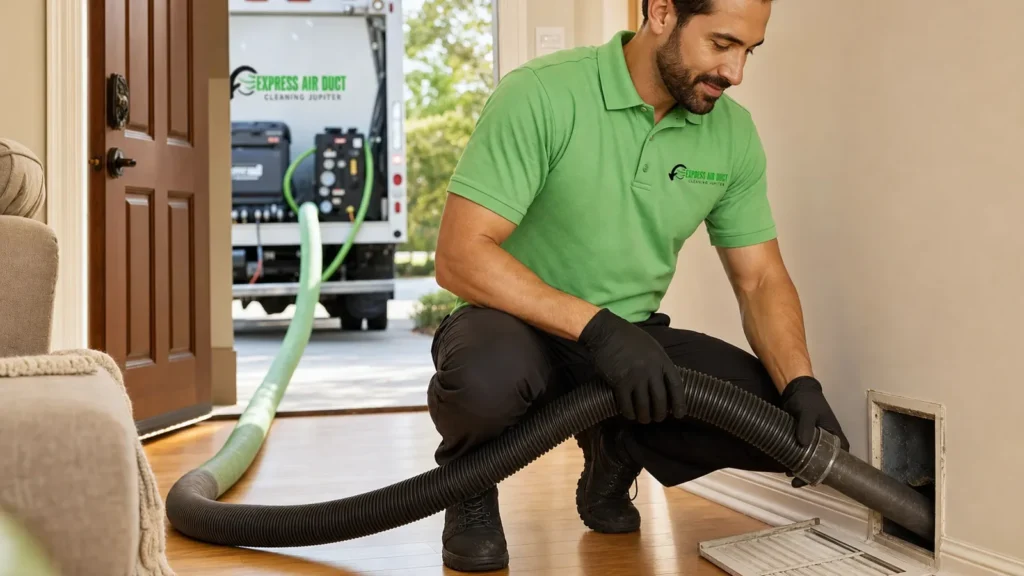
Setting Up the Negative Pressure System
The core of any professional duct cleaning is a high-powered vacuum unit that creates negative pressure inside the duct system. The technician connects a large-diameter collection hose to the main trunk line or to a return air plenum. This puts the entire duct network under suction, so that when debris is dislodged from duct walls, it gets pulled toward the collection unit rather than blown into your living space.
The vacuum unit is typically truck-mounted or a large portable unit. Either way, it should be rated to handle the volume of your home’s duct system. For a typical Tampa home with three to four tons of cooling capacity, the process takes roughly two to three hours from setup to teardown.
Agitating and Dislodging Debris
Negative pressure alone won’t remove debris that has bonded to duct walls over years of use. The technician uses a combination of tools to physically break debris loose. These typically include:
- Rotary brushes: Spinning bristle heads attached to flexible rods that scrub the interior duct surface as they travel through the run.
- Air whips: Pneumatic tools that send rapid bursts of compressed air in all directions, knocking debris off duct walls and into the airstream headed toward the collection unit.
- Hand brushes and scrapers: Used at register openings and in the air handler compartment where power tools can’t reach safely.
The technician works systematically, moving from the farthest supply registers back toward the air handler. Each register is opened, agitated, and then sealed before moving to the next, so that suction is concentrated in one section at a time. This methodical approach is part of what separates a {{service|professional duct cleaning}} from a quick blow-and-go service.
Cleaning the Return Air Side
Many homeowners don’t realize the return air side of the system, the large grilles that pull room air back to the air handler, often carries more debris than the supply side. Return air ducts pull in everything floating in your living space: pet dander, skin cells, carpet fibers, and cooking particles. The technician cleans return ducts using the same negative pressure and agitation approach, but these ducts are typically larger in diameter and may require a different brush size or a longer rod assembly.
What Happens After the Vacuuming Is Done
Post-Cleaning Inspection and Verification
Once all duct runs have been agitated and vacuumed, a thorough technician goes back and re-inspects key sections with the camera or flashlight. The goal is to confirm that the debris load has been significantly reduced, not just pushed around. If a section still shows heavy buildup, that run gets a second pass. You should feel comfortable asking to see post-cleaning images before the technician packs up.
Sanitizing Treatments (When Appropriate)
In Tampa’s humid climate, some homeowners opt for an EPA-registered sanitizing treatment applied to the interior duct surfaces after cleaning. This is an add-on service, not a default step, and it’s most relevant when the pre-cleaning inspection found visible microbial growth or when the home has experienced a flood or water intrusion event. The sanitizer is applied as a fine mist using the same duct access points used during cleaning, and it needs time to dry before the system is restarted.
A good technician will explain when a sanitizing treatment is genuinely warranted versus when it’s an unnecessary upsell. If your ducts were clean and dry to begin with, a sanitizer adds little value.
Reinstalling Covers and Restarting the System
Every register cover removed during the service gets reinstalled securely. The technician will also replace or reinstall the air handler access panel and reconnect any flex duct sections that were temporarily disconnected for access. Once everything is buttoned up, the system gets restarted and the technician checks airflow at several registers to confirm normal operation. This final check takes five to ten minutes and gives you a chance to ask questions before the technician leaves.
Comparing a Thorough Cleaning to a Rushed One
Not every duct cleaning visit follows the same standard. The table below outlines what separates a complete, professional service from a minimal one.
| Service Element | Complete Professional Visit | Minimal Visit |
|---|---|---|
| Pre-cleaning inspection | Camera or visual inspection, documented findings | Skipped or cursory glance |
| Negative pressure setup | Truck-mount or high-capacity portable unit connected to trunk line | Small shop-vac at individual registers |
| Agitation method | Rotary brushes and/or air whips through all runs | Compressed air only, no mechanical agitation |
| Air handler cleaning | Blower wheel, coil, and drain pan inspected and cleaned | Not included |
| Return air side | Fully cleaned with same rigor as supply side | Often skipped |
| Post-cleaning verification | Re-inspection, airflow check, documentation | System restarted without verification |
| Time on-site (typical 2,000 sq ft home) | 2 to 3 hours | 30 to 45 minutes |
How Often Should Tampa Homes Schedule Duct Cleaning?
General Guidelines and Local Factors
The NADCA (National Air Duct Cleaners Association) recommends having ductwork inspected annually and cleaned as needed based on those findings. For most Tampa households running their HVAC system ten or more months per year, a cleaning every three to five years is a reasonable baseline. Homes with pets, high occupancy, or recent renovation work often benefit from more frequent service, since construction dust and pet dander accelerate debris buildup significantly.
Signs That You Shouldn’t Wait
Some conditions call for scheduling a cleaning sooner rather than later, regardless of when the last service was performed:
- Visible dust or debris blowing from supply registers when the system starts up
- A musty or stale odor that appears or worsens when the air handler runs
- Noticeably uneven airflow between rooms that wasn’t present before
- Recent water intrusion, flooding, or a roof leak that may have introduced moisture into the duct system
- A new home purchase where the duct cleaning history is unknown
After Major Renovations
Remodeling generates fine particulate debris, drywall dust, insulation fibers, and wood particles that settle throughout the duct system even when vents are taped off during construction. If your Tampa home has had significant renovation work done, scheduling a duct cleaning before returning the HVAC system to normal operation is a practical step. Express Air Duct Cleaning Jupiter handles post-renovation cleanings regularly and can assess the debris load before committing to a full service plan.
Frequently Asked Questions
Do I need to be home during the entire duct cleaning visit?
Yes, it’s best to be present for the full visit. The technician will need access to every room to reach supply and return registers, and you’ll want to be available for the pre-cleaning walkthrough and the final system check. Plan for two to three hours for a typical Tampa home.
Will the cleaning make a mess in my house?
A properly set-up negative pressure system keeps dislodged debris contained inside the ducts and collection equipment. You may notice a small amount of dust near register openings when covers are removed, but a professional technician uses drop cloths and takes care around finished surfaces. The process should not leave a visible mess in your living space.
Can duct cleaning improve my HVAC system’s efficiency?
Heavy debris buildup on blower wheels and evaporator coils can restrict airflow and force the system to work harder to move conditioned air. Cleaning those components, along with the duct runs, can help restore designed airflow rates. Whether you notice a meaningful change in comfort or energy use depends on how much buildup was present before the service.
What’s the difference between duct cleaning and dryer vent cleaning?
They’re separate services. Duct cleaning addresses the HVAC supply and return air network. Dryer vent cleaning clears the exhaust path from your dryer to the exterior of the home. Lint accumulation in dryer vents is a fire hazard and should be serviced independently. Many homeowners schedule both at the same time for convenience.
How do I know if a duct cleaning company is doing the job properly?
Ask to see pre- and post-cleaning images from the inspection camera. Confirm that the technician is using a truck-mounted or high-capacity portable vacuum unit, not a standard shop vacuum. The job should take at least two hours for a typical home. A technician who finishes in under an hour and charges very little likely skipped critical steps.
Is there anything I should do after the cleaning is complete?
Replace your HVAC filter immediately after the service, even if the current filter is relatively new. The cleaning process can dislodge fine particles that the filter will capture during the first few run cycles. Check your filter again after 30 days and replace it if it looks heavily loaded. Beyond that, normal maintenance, regular filter changes and annual HVAC tune-ups, keeps the system running efficiently between cleanings.
Conclusion
A professional air duct cleaning visit in Tampa involves a lot more than running a vacuum through a few vents. From the initial camera inspection to the final airflow check, a complete service is methodical, equipment-intensive, and specific to the conditions of your home and duct system. Knowing what the process looks like helps you ask the right questions, recognize quality work, and get real value from the service. When you’re ready to see the process firsthand, {{service|schedule your Tampa air duct cleaning with Express Air Duct Cleaning Jupiter}} and get a clear picture of what’s inside your system.